Need a secure way to mount gear, tools, or cargo in your trailer, shed, or ute? GRUNT E-Track systems offer unmatched flexibility for vertical or horizontal storage setups. Whether it’s for a commercial fleet or weekend hauling, installing E-Track the right way ensures strength, safety, and long-term performance.
Follow this step-by-step guide to learn how to install E-Track using GRUNT’s heavy-duty system.
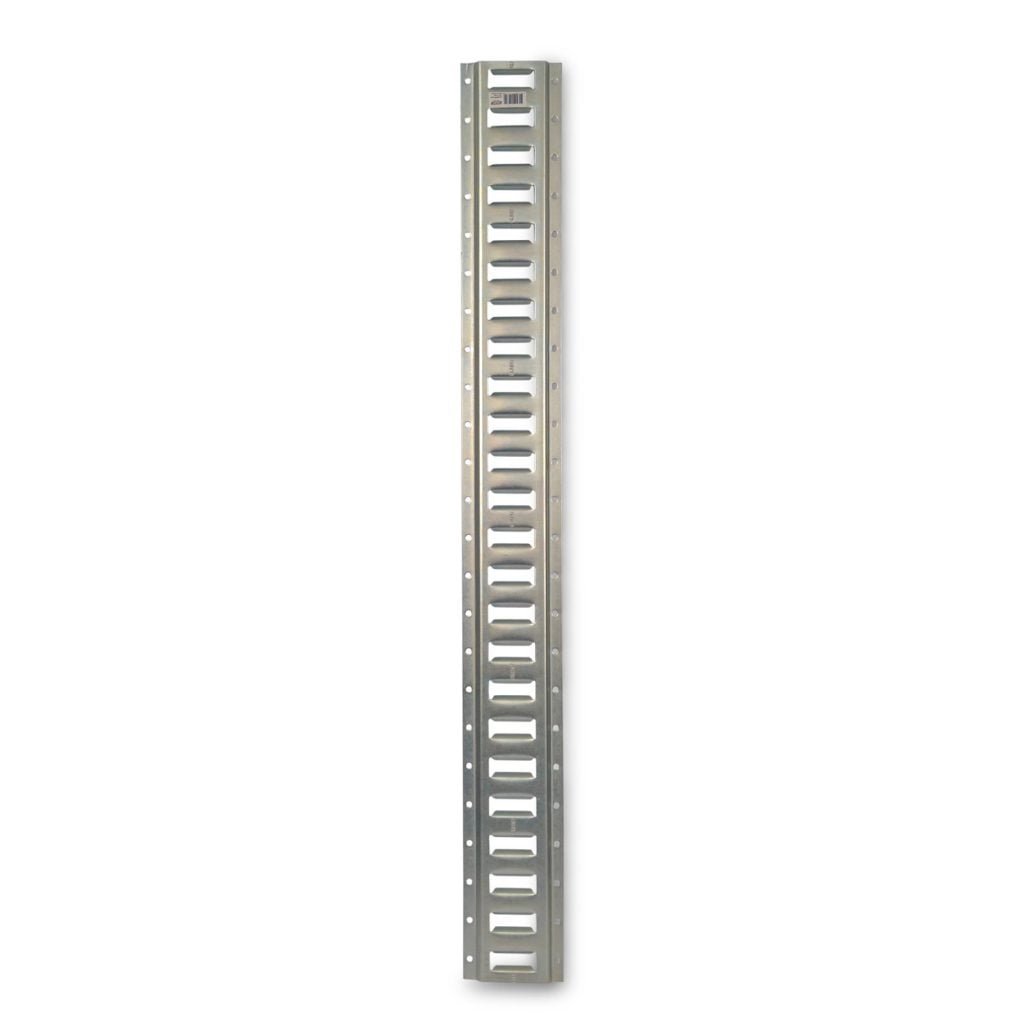
What Is an E-Track?
E-Track is a versatile mounting rail designed to hold brackets, hooks, and tie-downs. It’s widely used in trailers, trucks, and commercial setups to secure tools, equipment, and cargo.
With GRUNT’s easy-clip hardware, installation is simple—and the result is a storage system you can count on.
Step-by-Step: How to Install GRUNT E-Track
Step 1: Plan Your Layout
Before drilling anything, map out your E-Track configuration.
- Vertical E-Track: Great for walls and vertical mounting.
- Horizontal E-Track: Ideal for floor installs or long horizontal runs on walls.
Tip: Consider what gear you’re hanging (rakes, trimmers, tie-downs, etc.) and mark out where the tracks will go.
Step 2: Remove Existing Fixtures
If you’re retrofitting an existing trailer or workspace, remove any old brackets or panels first. Clean the surface to ensure a smooth install.
Step 3: Cut Openings for Obstructions (if needed)
If any part of the wall or trailer frame interferes with a flush install, you may need to:
- Cut the wall lining for the E-Track to sit flush
- Or use spacers to lift the track above obstacles
Use a circular saw and chisel to create clean, shallow openings. Always wear ear and eye protection.
Step 4: Find the Studs
To mount securely, you’ll want to screw into the metal studs behind the walls.
- Look for screw lines or seams that reveal stud locations.
- Use a pencil or marker to note where your screws will go.
Step 5: Align and Mark Your Track
Once your wall is prepped:
- Hold the track in place.
- Use a level to ensure it’s straight.
- Mark where each screw will go.
If aligning multiple rails (e.g., top and bottom), match them up by eye or measure from fixed points.
Step 6: Drill & Secure with Self-Tapping Screws
Use 1″ self-tapping screws with a 3/8″ head. These are ideal for thin trailer walls and metal studs.
Installation tip:
- Use an impact driver to start the screw
- Switch to a manual ratchet to finish tightening without overstripping
- Don’t overtighten—just snug enough to be secure
Step 7: Repeat & Customize Your Setup
Add additional rails based on your gear. GRUNT recommends spacing rails to accommodate tool lengths and storage bins.
- Want more holding power? Attach a plywood backer board to spread load across more studs, then mount your track into that.
Step 8: Cut Track to Fit (if needed)
If your track length needs to be shortened:
- Use a cut-off wheel or metal blade
- Cut at the middle of a mounting hole seam if possible
- Smooth out sharp edges and face them away from high-traffic zones
Final Look
Once installed, GRUNT E-Track gives you:
- A flush, sturdy mounting system
- Space to add hooks, clips, bungees, and tie-downs
- Flexibility to expand later